HUB 06 · Guides
How to Use a Vegetable Chopper
Two tools share one name and need opposite techniques: a push-dicer wants a single decisive press, a bladed chopper wants short pulses and a scrape-down. Getting them the wrong way round is why most choppers disappoint.
We earn a commission if you buy through our links. It does not change the price you pay, and it does not decide our picks — our selection criteria are published in full. How this works.
Cut the food narrower than the grid, then press once, hard. That is the whole technique for a push-down dicer, and the two halves of it are where almost everyone goes wrong — oversized pieces jam the grid, and two tentative presses crush food that one committed press would have cut. A bladed electric chopper needs the opposite instinct: one-second pulses, not a continuous run, with one scrape-down halfway. Below is the full routine for each, the onion method step by step, and the six things you should never put in either.
Which tool do you have? If you lay food on a grid of blades and press a hinged lid, you have a push-dicer — it makes cubes. If food goes in a bowl and a blade spins, you have a bladed chopper — it makes an uneven mince, and it cannot make a cube at any setting. The two need different technique, different food preparation and different expectations, and the difference is settled in electric vs manual.
Using a push-down dicer
Step 1 — set it up so it does not move
Put the tool on a dry, flat surface with the catch container seated and the chosen insert pressed fully home from underneath. A rocking insert cuts at the wrong angle and feels blunt. Check which grid you have fitted before you start: on a Fullstar the published set is a fine dicer, a medium dicer, a 2 mm slicer and a grater, and the medium dicer is the right default for almost everything.
Step 2 — prepare the food to fit the grid
This is the step people skip. Peel what needs peeling, cut out the core or stem, and cut the piece narrower than the grid opening. A whole onion half will go through a full-size grid; a whole carrot will not, and forcing it stresses the housing rather than the blades. Halve round food to give it a flat face so it cannot roll.
Step 3 — one stroke, straight down
Place the food flat side down, bring the lid down to meet it, then press in one continuous motion using your body weight, not your wrist. Keep the press square: a lid pressed at an angle shears food sideways instead of through, which is what produces half-cut pieces and a stuck grid. Hard vegetables want a firmer, slower press rather than a faster one.
Step 4 — clear before you reload
Lift the lid, and if anything is wedged in the grid, push it through from the top with the next piece or clear it with the guard — never with a finger from underneath, where the blade edges are. Empty the container when it reaches the fill line; cubes piling against the grid from below make the next press much harder.
Step 5 — rinse before you cook
Ten seconds under a running tap while the residue is still wet, flushing from the underside so debris leaves the way it came in. This one habit is the difference between a chopper that stays in use and one that lives in a cupboard. The full routine is in how to clean a vegetable chopper.
Using a bladed chopper
Step 1 — cut to roughly even pieces first
A spinning blade cannot make big pieces small and small pieces smaller at the same time. Cut everything to about the same size — quarters for an onion, inch pieces for a carrot — or you will get purée and chunks in the same bowl.
Step 2 — fill to between a third and two-thirds
Too little and the food is thrown to the wall and never meets the blade again; too much and the blade cannot circulate it at all. The Ninja Express Chop (NJ110GR)holds 16 oz, so roughly one medium onion in quarters is a comfortable load.
Step 3 — pulse, do not run
Two or three one-second pulses, then look. Pulses give you control over texture; a continuous run gives you a wet paste in about five seconds. On a pull-cord chopper such as the Brieftons QuickPull Manual Food Chopper (4-Cup), the equivalent is counting pulls — three or four, then check — which is why the first session or two is calibration.
Step 4 — scrape down once
The first pulse throws food up the wall. One pass with a spatula and one more pulse is the difference between an even mince and half a bowl of untouched pieces.
Step 5 — empty carefully, then wash
Lift the blade out before tipping if the mixture is wet. Most of these publish dishwasher-safe removable parts — the Ninja states bowl, blades and lid, the Cuisinart Elemental states all removable parts — but the base is electrical and is wiped only, never submerged.
The onion, step by step
Onion is the job this category exists for, so it is worth being specific. In a push-dicer: trim the root end flat but leave it attached so the layers hold together, peel, halve through the root, lay a half flat side down, and press. The root end going in last means the layers are held until the moment they are cut. In a bladed chopper: peel, quarter, pulse three times, scrape down, pulse once more. If your eyes are the problem rather than your knife skills, that is a different fix — see chopping onions without crying.
What to keep out of both
| Keep out | Why | Do this instead |
|---|---|---|
| Stones and pits | Chips thin stainless in one pass; a chip cannot be repaired | Stone the avocado, peach or olive first |
| Frozen food | Harder than any vegetable the grid was designed for | Thaw, or use a knife |
| Bones and shells | Same chipping risk, plus a hygiene problem in the cells | Shears or a cleaver |
| Dead-ripe tomatoes and soft fruit | No structure to press against, so it bursts | Firm Roma, or a knife — see the tomato page |
| Stringy ginger and lemongrass | Fibres wrap the spindle or bridge the grid | Slice across the grain first, or use a grater |
| Hot liquids | Plastic bowls are not rated for them; steam lifts lids | An immersion blender, with its own safety rules |
Safety, briefly but seriously
A dicing grid is a field of standing edges that you cannot see once food is on it. Use the finger guard if your tool ships one — Fullstar publishes one, as does the cleaning brush — keep fingers on the lid rather than the rim, and never reach under the grid to clear it. The riskiest moment for every chopper is not the cutting but the washing: hands in soapy water around edges you cannot see. Wash with a brush rather than a cloth, and if you own cut-resistant gloves, this is a reasonable job for them — our honest assessment of what gloves stop names washing a dicing grid as one of the cases knit genuinely helps with.
Five problems and their causes
Half-cut pieces hanging in the grid. The press was not square, or not committed. Press straight down in one motion.
It takes all your strength. Food cut too big, grid clogged, or container full. In that order of likelihood.
Mush instead of cubes. The food was too ripe or too soft for a push-dicer. No technique fixes a dead-ripe tomato.
Purée instead of mince. You ran the bladed chopper instead of pulsing it. There is no recovery; start again with pulses.
Whole pieces left untouched in the bowl. Bowl too empty or too full, or you skipped the scrape-down.
Why this page is not the dicer roundup
The best vegetable dicers and the best electric choppers rank the tools; how to dice vegetables is the same cut with a knife; and the cleaning guide is what happens afterwards. This page is only the technique, because the technique is the part that decides whether a chopper feels like a good purchase — and almost nothing in the box explains it.
What we are not claiming
We have not tested these four tools. The blade sets, capacities, included guards and brushes, and dishwasher-safe claims referred to above are each maker’s own published wording, cited below and on each product card. The technique is mechanism and ordinary kitchen practice, offered as reasoning you can check rather than as a test result. Prices come live from Amazon with the date attached.
The hardware
The hardware this guide is about
The products this guide refers to, with prices pulled live from Amazon and dated on every card. Full rankings live in the roundups linked above.
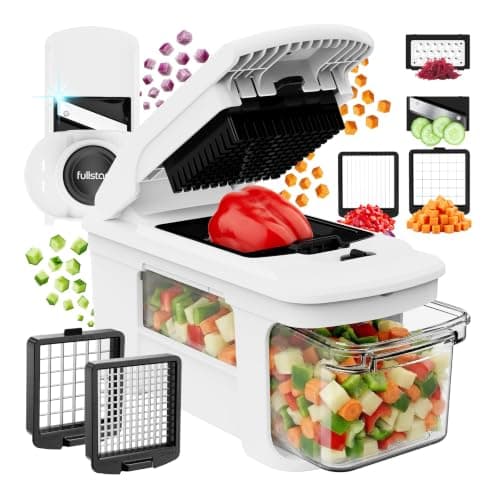
Even manual dicing
Fullstar Pro XL Vegetable Chopper & Mandoline
The best-selling push-down dicer: press the lid and vegetables fall through a grid into neat, even cubes.
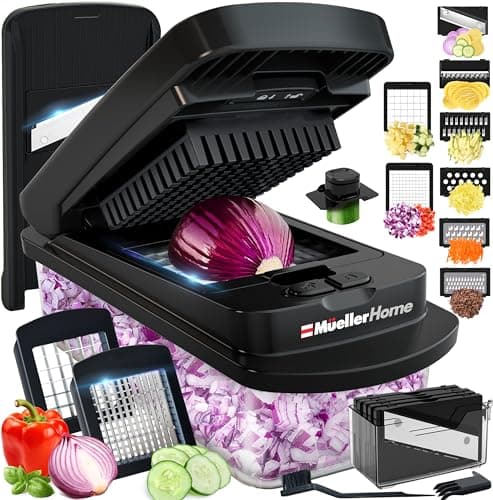
Most blade options
Mueller Pro-Series 10-in-1 Vegetable Chopper
A push-dicer with the widest blade set here — eight inserts covering dice, slice, grate and spiralize.
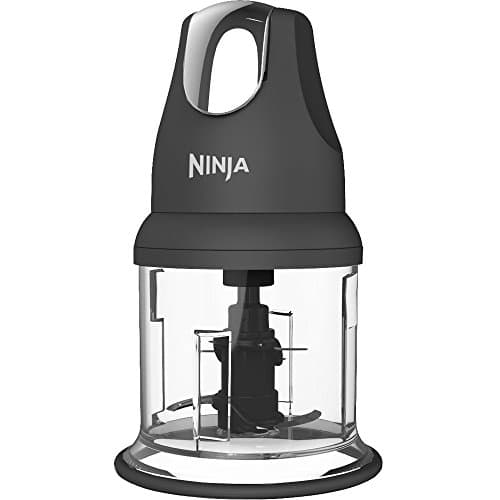
Fast electric chopping
Ninja Express Chop (NJ110GR)
The electric chopper to beat: a 200-watt, one-touch bowl that turns onions and nuts to an even mince in seconds.
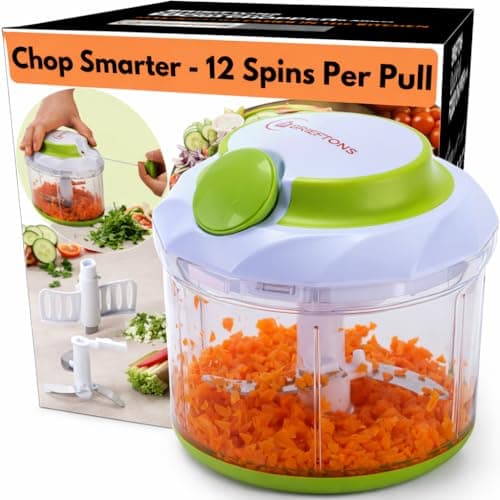
Cordless, quiet chopping
Brieftons QuickPull Manual Food Chopper (4-Cup)
The pull-string chopper: yank the cord a few times and the blades spin — no power, no batteries, no noise.
#ad · As an Amazon Associate we earn from qualifying purchases.
Questions
Frequently asked
How do you use a vegetable chopper properly?
How do you use a vegetable chopper for onions?
Why does my chopper leave food half cut?
Can you put a vegetable chopper in the dishwasher?
What should you not put in a vegetable chopper?
Keep reading
Related
Receipts
Sources
- Amazon listing - Fullstar Pro XL Vegetable Chopper & Mandoline (4 blades in 420J stainless - fine dicer, medium dicer, 2 mm slicer, grater - 1.8 L container with lid, finger guard and cleaning brush included)
- Amazon listing - Mueller Pro-Series 10-in-1 Vegetable Chopper (8 interchangeable stainless blades, 1.2 L catch container)
- Amazon listing - Ninja Express Chop NJ110GR (16 oz bowl, 200 W, stacked stainless blades, dishwasher-safe bowl, blades and lid)
- Amazon listing - Brieftons QuickPull Manual Food Chopper, 4-cup (pull-cord drive spinning stacked stainless blades, removable blades, hand wash)
We do not run a testing lab and we do not pretend to. Specifications come from the manufacturer's own published documents and from published standards; prices come from the live Amazon API. Where a figure is not published, the page says “not published” rather than guessing. Read the full method.