HUB 06 · Guides
How to Make Peanut Butter in a Food Processor
It is one ingredient and one machine, and almost everyone gives up at the same moment: the stage where it forms a dry ball and looks ruined. That stage is the recipe working. Here is the whole method, and what to do at each point.
We earn a commission if you buy through our links. It does not change the price you pay, and it does not decide our picks — our selection criteria are published in full. How this works.
Peanut butter is peanuts and nothing else, ground until the cell walls break down and the oil comes out. Put two cups of roasted, unsalted, shelled peanuts in a food processor, run it in two to three-minute bursts with a scrape-down between each, and in roughly eight to twelve minutes you will have smooth peanut butter. No oil, no water, no liquid of any kind. The only genuinely optional additions are salt and a sweetener, and both go in at the very end.
The stage that makes people quit. About four minutes in, the crumbs turn into a thick, dry paste that balls up and climbs the bowl wall, and the machine starts to labour. Nothing has gone wrong. That is the moment before the oil releases, and the only correct action is to scrape it down and keep going. Adding oil here is the single most common mistake: it loosens the mass so the blade slips past it instead of grinding it, and you end up with grainy, oily peanut butter rather than smooth peanut butter.
What you need
Two cups of roasted, shelled, unsalted peanuts — about 10 oz, which makes roughly a standard jar. Raw peanuts work but take noticeably longer, so roast them first (below). Salted peanuts work; just skip the added salt.
A food processor with a wide bowl. Capacity matters in both directions. Two cups of nuts in a 14-cup bowl spreads thin and the blade catches it fine; the same two cups in a 3-cup bowl packs solid and strains the motor. If you own a small machine, halve the batch. The best food processors for nut butter page ranks machines specifically on the headroom this job demands.
A flexible spatula. You will use it four or five times, and a stiff spoon will not clear the wall properly.
Optional: half a teaspoon of fine salt, and a tablespoon of honey or maple syrup. Both at the end only.
The method
Step 1 — roast, if the nuts are not already roasted
Spread the peanuts on a tray and roast at 350 °F for about twelve minutes, shaking once, until they smell nutty and the skins darken. Let them cool for five minutes — warm, not hot. Warm nuts give up their oil far more readily, and this step does more to shorten the grind than any machine upgrade. Do not skip the cooling: genuinely hot nuts can soften a plastic bowl and will steam under the lid.
Step 2 — crumbs (about 60 seconds)
Fit the standard chopping blade — not a dough blade, not a disc — and run the machine. The nuts go to coarse crumbs almost immediately, then to a fine, sandy meal that looks like wet breadcrumbs. Stop at about a minute and scrape the walls.
Step 3 — the dry ball (2 to 5 minutes)
Run it again. The meal gathers into a thick mass that rides up the side of the bowl and the motor note drops. This is the stage described in the callout above. Stop every ninety seconds or so, scrape the mass back down onto the blade, and continue. Expect three or four scrape-downs here. If the machine stops by itself and will not restart, it has tripped its thermal cut-out to protect the motor — leave it half an hour and carry on; nothing is broken.
Step 4 — the oil releases (1 to 3 minutes)
Quite suddenly, the mass goes glossy and starts to move like a liquid, pooling rather than clumping. From that point another two minutes of running is what takes it from “peanut paste” to the texture you recognise from a jar. Do not stop early: the difference between slightly gritty and properly smooth is almost entirely in these last two minutes.
Step 5 — season, then jar
Add salt and any sweetener now and pulse five or six times to combine. Scrape into a clean jar. It will be warm and quite loose, and it firms considerably as it cools — judge the final texture cold, not warm.
What each stage looks like
| Stage | Roughly | What you see | What to do |
|---|---|---|---|
| 1. Crumbs | 0–1 min | Coarse chop, then a dry sandy meal | Run continuously; scrape once |
| 2. Dry ball | 2–5 min | Thick mass climbing the bowl; motor labours | Scrape down every 90 seconds. Add nothing |
| 3. Oil release | 5–8 min | Turns glossy and starts to flow | Keep running — it is nearly there |
| 4. Smooth | 8–12 min | Pourable, no grit on the tongue | Season, pulse, jar |
Five things that go wrong
It is grainy and will not smooth out. Almost always under-grinding, and almost always because oil went in during the dry-ball stage. Keep running it; a few more minutes usually rescues it. If oil was added early, it may stay slightly grainy — use it for cooking and start the next batch dry.
It stalled and the machine stopped. A thermal cut-out doing its job. Wait half an hour. Next time work in shorter bursts, and consider a smaller batch if your machine is at the lower end of published wattage.
It separated in the jar. That is what natural peanut butter does — there is no emulsifier in it. Stir it back together, and store it in the fridge to slow the separation.
It tastes flat. Salt, and roasting. Unroasted peanuts make a noticeably duller butter, and half a teaspoon of fine salt in a jar’s worth changes it completely.
It is too stiff. Judge it cold first, because warm peanut butter is always loose. If it is genuinely too thick for you once cold, a teaspoon of neutral oil stirred in at that point is the right time to add it.
Other nuts, same method
Almonds and hazelnuts take considerably longer than peanuts — they are harder and drier — and the dry-ball stage lasts much longer, which is where most almond-butter attempts are abandoned. Cashews and macadamias are softer and faster. Pecans and walnuts are oily enough that they can go from meal to butter very quickly, so watch them. The best chopper for nuts page covers the opposite job — a coarse chop rather than a paste — and the difference is simply how long you leave the machine running.
Storage
A clean sealed jar in the fridge is the standard advice for home-made nut butter, and chilling also slows the oil separating out. It will be firm straight from the fridge; a few minutes at room temperature makes it spreadable again. There is no preservative in it, so treat it like any other fresh home-made food: clean jar, clean spoon, and use your nose.
Can you do it without a food processor?
A high-powered blender with a tamper does this well and faster, and a blender without a tamper does it badly — the paste wedges above the blade and spins on air. We set out the whole comparison in food processor vs blender for nut butter. An immersion blender cannot do it at all. A mortar and pestle genuinely can, for a small quantity and a lot of effort, because a pestle ruptures cell walls rather than slicing them — which is exactly what releases the oil.
What we are not claiming
We have not made peanut butter in these four machines, and the timings above are the ranges commonly given for this process rather than measurements we took. Every bowl volume, watt figure and control description attached to a pick below is the manufacturer’s own published wording, cited on the product and on the roundup. The food-handling guidance is standard practice, not a shelf-life study. Prices come live from Amazon with the date attached.
The hardware
The hardware this guide is about
The products this guide refers to, with prices pulled live from Amazon and dated on every card. Full rankings live in the roundups linked above.
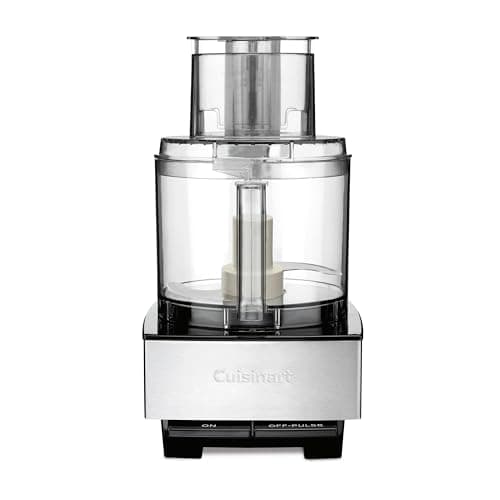
Most full-size kitchens
Cuisinart 14-Cup Food Processor (DFP-14BCNY)
The default full-size processor for a reason: a big, simple, 720-watt workhorse with the shortest parts list to go wrong.
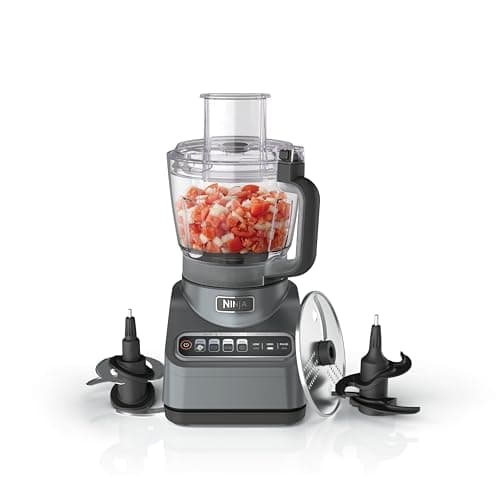
Value and dough
Ninja Professional Plus Food Processor (BN601)
The value pick: a 1,000-peak-watt motor and a dough blade for well under half the price of the premium machines.
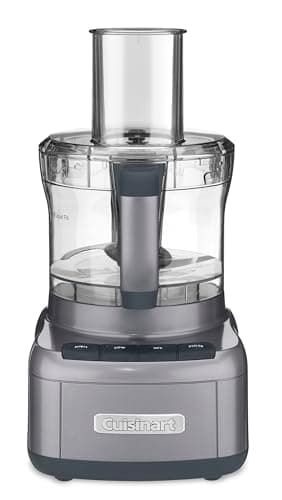
Small households
Cuisinart Elemental 8-Cup Food Processor (FP-8SV)
The right-size middle option: a 350-watt 8-cup that fits smaller kitchens and everyday jobs without going mini.
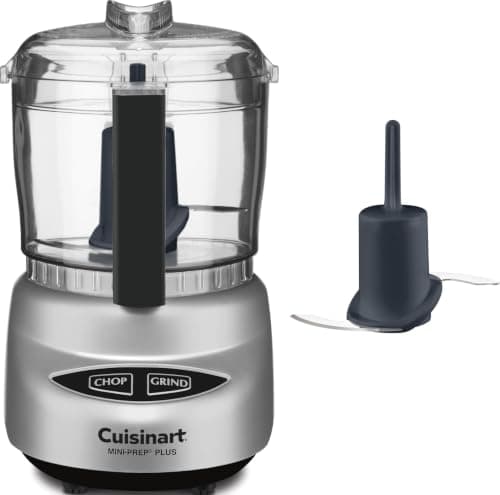
Small daily chopping
Cuisinart Mini-Prep Plus (DLC-2ABC)
The 3-cup workhorse for small jobs: chopping herbs, an onion, a bit of dressing — without hauling out a big bowl.
#ad · As an Amazon Associate we earn from qualifying purchases.
Questions
Frequently asked
How long does it take to make peanut butter in a food processor?
Do you need to add oil to make peanut butter?
Why is my homemade peanut butter not creamy?
Can you make peanut butter in a mini food processor?
Does making peanut butter damage a food processor?
Keep reading
Related
- The best food processor for nut butterThe machines ranked on the headroom this job needs.
- Food processor vs blender for nut butterWhy the bowl shape decides it.
- The best chopper for nutsThe same ingredient, stopped much earlier.
- How to clean a food processorAn oily bowl is the one real cost of this recipe.
Receipts
Sources
- Amazon listing - Cuisinart 14-Cup Food Processor DFP-14BCNY (14-cup work bowl, 720 W motor, stainless chopping/mixing blade)
- Amazon listing - Ninja Professional Plus Food Processor BN601 (9-cup bowl, 1,000 peak watts as printed in the title, chopping blade and dough blade)
- Amazon listing - Cuisinart Elemental 8-Cup Food Processor FP-8SV (8-cup work bowl, 350 W motor, on/off/pulse controls)
- Amazon listing - Cuisinart Mini-Prep Plus DLC-2ABC (24 oz work bowl, 250 W, reversible sharp/blunt auto-reversing blade)
We do not run a testing lab and we do not pretend to. Specifications come from the manufacturer's own published documents and from published standards; prices come from the live Amazon API. Where a figure is not published, the page says “not published” rather than guessing. Read the full method.